Set up your organisation
After you sign up and verify your email, choose Organize a show and enter your club or organisation name on the Set up your club step. That creates your organisation, and Car Show Expert gives it its own web address. Your organisation is the container for all your shows, classes, and staff — it stays the same year after year.
If your club already has an organisation, you'll see a warning listing it. Use Ask to be added rather than starting a second one, so your shows and history stay in one place. If yours is a genuinely different organisation, choose Create a new organisation anyway.
Create the show
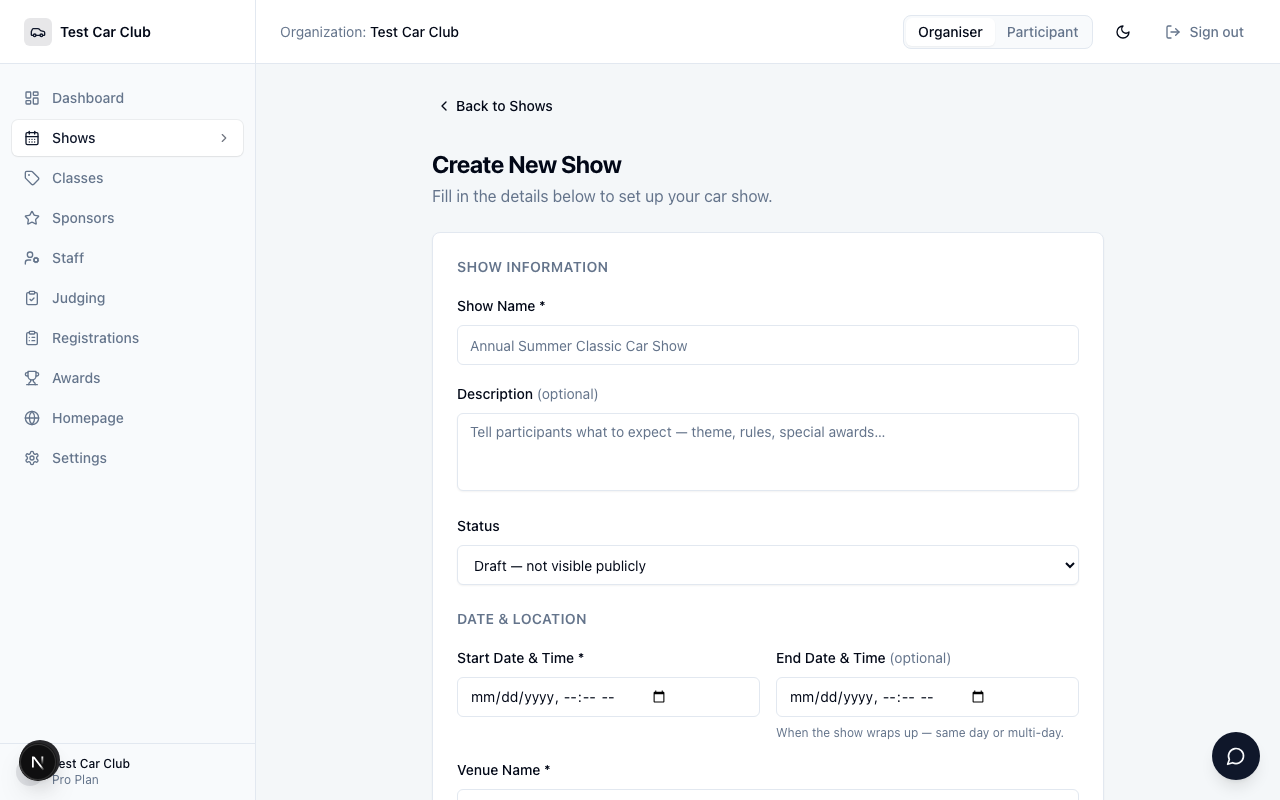
Click Shows in the sidebar, then click New Show. A tier picker appears first — select Basic (free) to continue.
Fill in the required fields under Show Information:
- Show Name — the public-facing name entrants will see on the registration form.
- Start Date & Time — when gates open, not when registration opens.
- Venue Name — the name of the location (e.g. Riverside Fairgrounds).
- Full Address — the street address shown to entrants and on the public page.
Leave Status set to Draft for now. Description, end date, and programme notes are optional — add them when you're ready.
Click Create Show. You land on the show detail page.
Check your entry limit
Basic shows have a limited number of entries. The amber banner at the top of the show page shows your show's exact limit. If you expect to exceed it you'll need to upgrade to Expert before you open registration — it's easier to do that now than after entrants have already signed up.
If that limit is enough for your show, move on to the next step.
Add at least one vehicle class
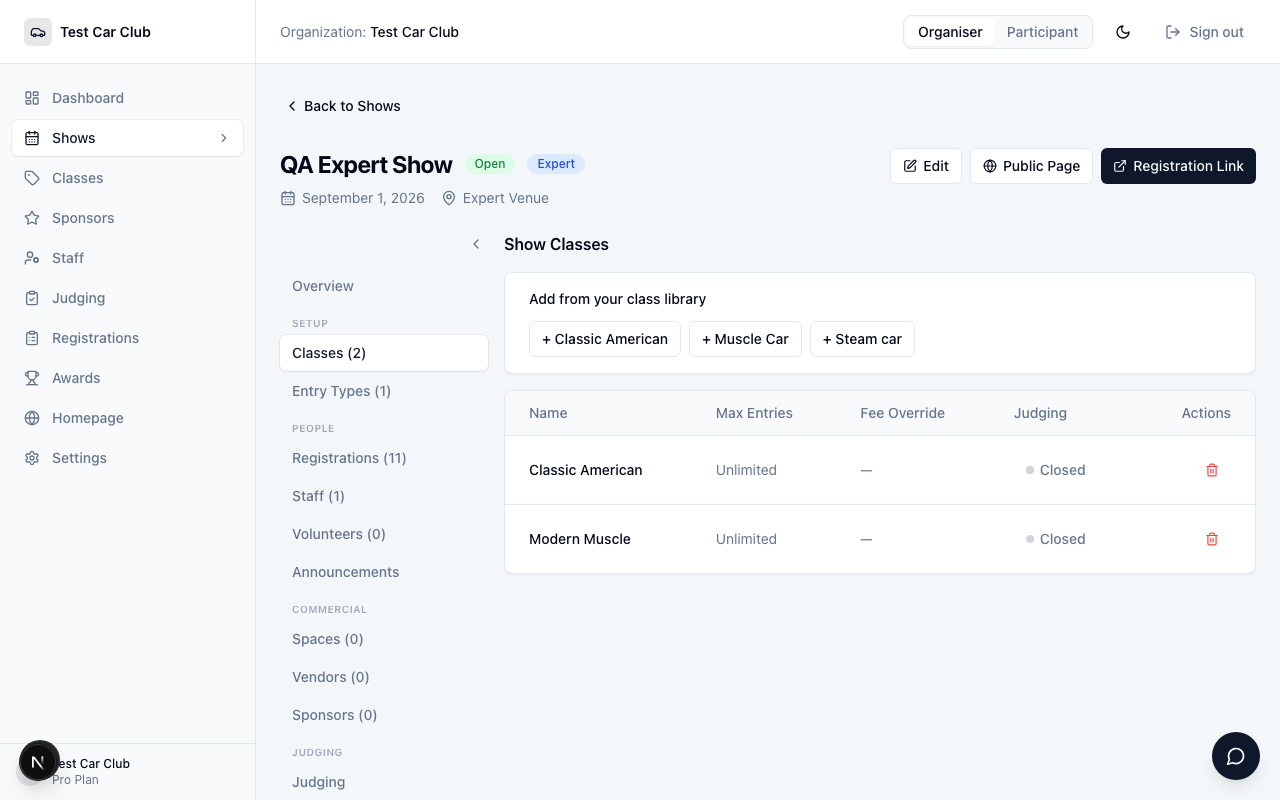
Click the Classes tab. Classes are how entrants self-select their vehicle category at registration — without at least one class, the registration form has no category for entrants to choose.
If you have classes in your library, they appear as buttons under Add from your class library — click any to add it. If your library is empty, click Create a class in your library, add the class, then return to the show and add it.
Repeat for each class you want to offer. You can add more later, even after registration opens.
Open registration
Click the Edit button at the top of the show page. Change Status from Draft — not visible publicly to Open — accepting registrations. Save the form.
Status lifecycle at a glance
- Draft — show exists but is not publicly visible. Use this while setting up.
- Open — registration form is live and accepting entries.
- Closed — registration form is disabled. Use this the day before the show.
- Live — the event is happening. This enables the check-in screen.
- Completed — the event has finished. Results can still be viewed.
Copy and share the registration link
Once the show is Open, a Registration Link button appears in the top-right corner of the show page. Click it to open the public registration form in a new tab, then copy the URL from your browser's address bar.
Share this link wherever your entrants are — club email lists, Facebook groups, Instagram bio, your club website. Anyone with the link can register without needing an account.
What entrants see when they register
The registration form asks for name, email, vehicle year, make, model, colour, and class selection. Entrants can optionally add their state and licence plate. No account is required. On submission they receive a confirmation and their registration is set to Pending in your dashboard.
Review registrations and confirm entries
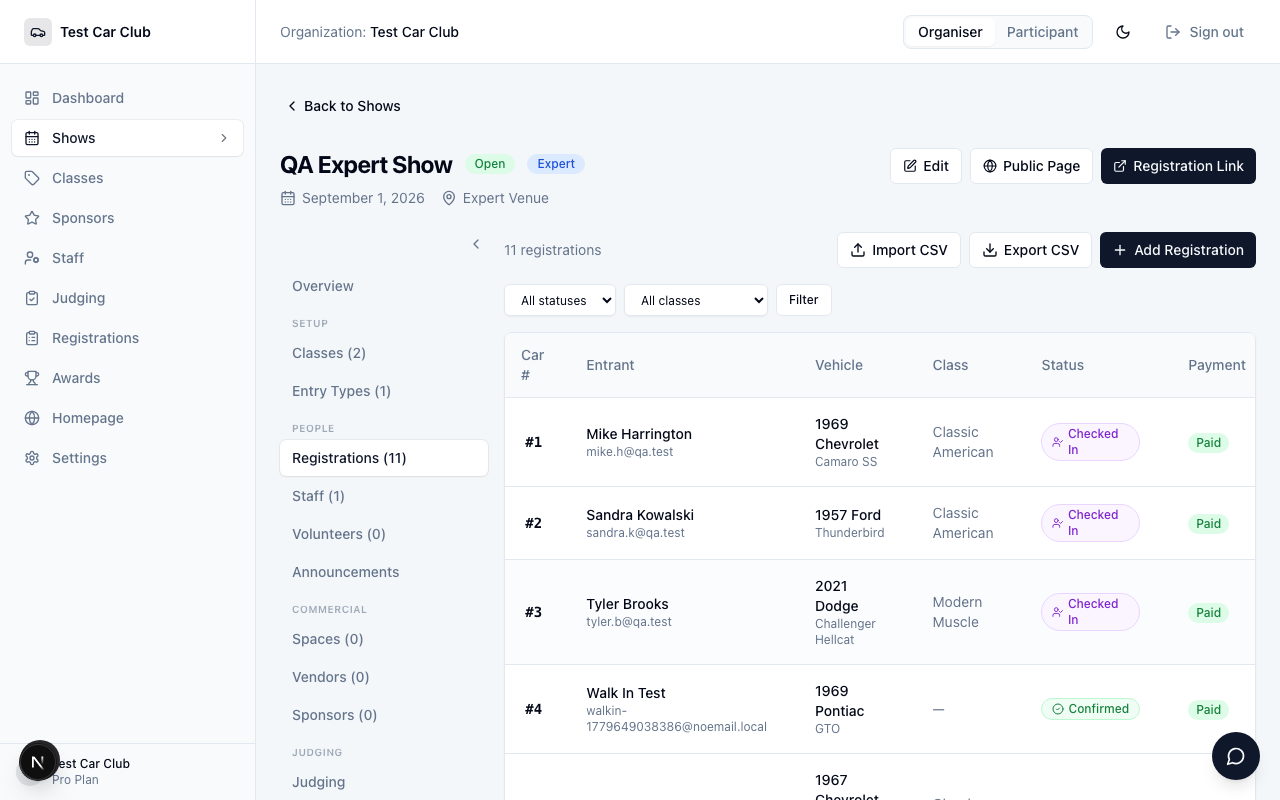
Open the Registrations tab on your show page. Each new entry arrives as Pending. Use the row actions to set a registration to:
- Confirmed — the entrant has a spot. They keep their place if the show fills up.
- Waitlisted — the entry is in the queue. Promote to Confirmed if a spot opens.
- Withdrawn — the entrant has cancelled.
Use the status filter dropdown to view only Pending or only Confirmed entries. You can also add a walk-in registration manually with the Add Registration button.
Show day: checking in entrants
Before the event starts, set the show status to Live via the Edit page. This enables the check-in screen.
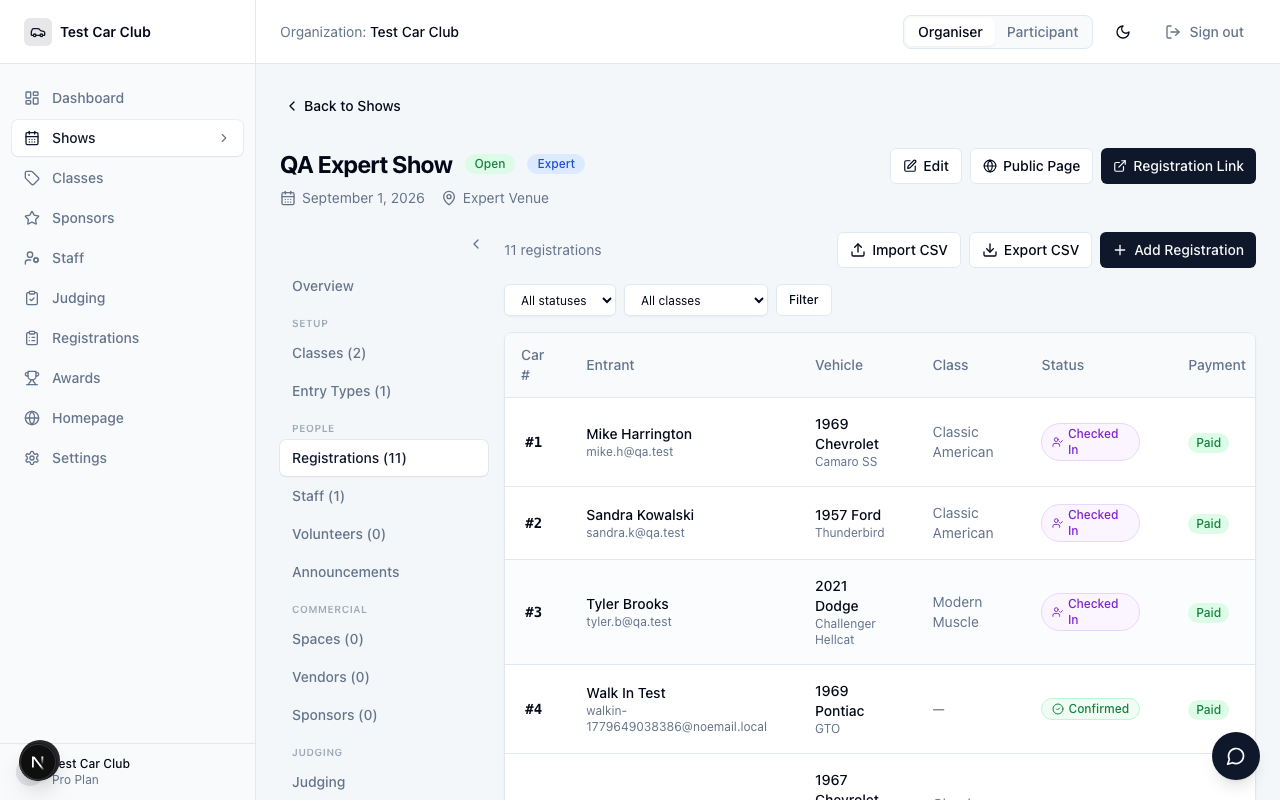
On the show page, go to the Registrations tab and click Check-In. The check-in screen opens. Type a name or car number into the search box to find an entrant, then tap their row and confirm the check-in. The entry status updates to Checked In immediately.
Need to add a walk-in on the day? Use Add Registration from either the Registrations tab or the check-in screen to create the entry and check it in at the same time.
Basic shows: name and number search only
QR code scanning at the gate is an Expert show feature. On a Basic show, your gate volunteers search by entrant name or car number. It works well for smaller shows — just make sure volunteers have the check-in screen open on their phones before the first car arrives.
After the show: wrap up and export
When the event is finished, set the show status to Completedvia the Edit page. This closes the registration form and the check-in screen.
To export your entry data, open the Registrations tab and click Export CSV. The file includes every registration with name, vehicle details, class, status, check-in timestamp, and payment status. Use it for your records, your committee report, or next year's mailing list.
What's not included on a Basic show
- QR code check-in — Gate volunteers search by name or number instead.
- Digital judging — Judges score on paper; you tally results manually.
- People's Choice voting — Not available — run a physical token vote if needed.
- Unlimited entries — Basic shows have a limited number of entries.
- Awards management — No digital award assignment or results publishing.
- Sponsor management — Sponsor profiles and branding are Expert-only.
You can upgrade a show to Expert at any time from the show's Edit page for $29 per show.
You're ready when you have
- A show created with name, date, venue, and address
- At least one vehicle class added to the show
- Show status set to Open
- Registration link copied and shared with entrants